NEWS, EDITORIALS, REFERENCE
How Does the 1541 Drive Work
I am writing about a drive technology that was released in 1982, but whose essential origins stretch back into the decade before that, let's call it 40 years old. And I'm writing this just a few nights after watching Apple's 2020 iPhone 12 media event. This year, as every year, this new iPhone is the bestest at everything. The juxtaposition of the modern and the retro has never been more extreme. But, here's the thing, it doesn't matter whether it's 11 billion or 5 billion or 1 billon whatevers, one thing remains the same: you can't get into an iPhone and see how it works.
I used to be the kid who loved this new-fangled thing called home computers, and looked down my nose at my father's friend who drove a restored antique buggy down the back roads. He took me for a ride once. It was slow and deafeningly loud, like hundreds of explosions going off inside a metal box right beneath your head. It was bumpy and rough, and frankly, it stank of gasoline. But now I'm almost 40, and you know what? I get it! I understand now. Sure, he's 70 now, and that's why he was into antique cars not computers. But when a youth of today looks at a Commodore 1541 drive, surely they will not understand why anyone would waste their time.
A 1541 drive weighs several pounds, it heats up like mad as it sucks back electric power, it's loud and is prone to a variety of failures, and yet it only has a maximum throughput of between ~4 to ~25 kilobytes per second. And its storage media are fragile, with sensitive parts open and exposed, 5.25" square, with a maximum capacity of only 170 kilobytes (per side.) The analogy to the antique car is nearly perfect. Why would anyone want to waste their time frigging around with one of these ancient lumbering monstrosities? But it has all become clear to me. You can open a 1541 drive up, you can see its components with your naked eyeballs. You can clean and tune its parts by hand. But best yet, you can study it and learn about it, and actually come to a satisfying level of comprehension about how it works. And that feels fantastic.
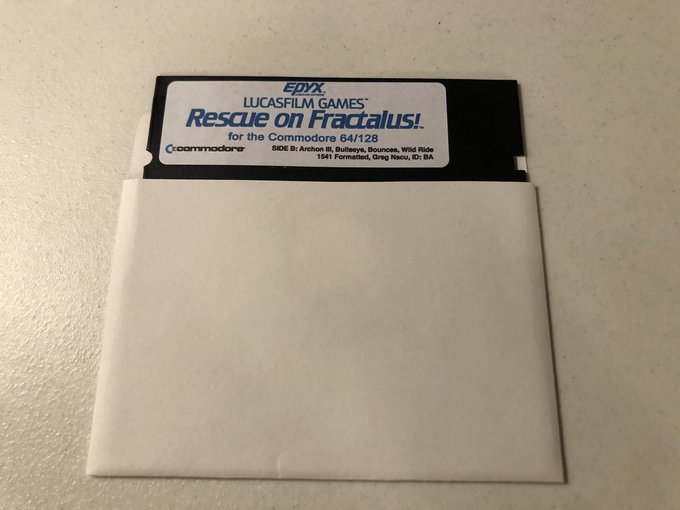
I have a shoe box full of old disks with commercial and pirated games that came into my possession over the years from machines I picked up from other people. Each disk has a crappy little hand-written sticker listing the disk's contents. There are numerous problems with these little stickers.
- They are ugly and inconsistent
- They have spelling mistakes
- They have straight up mistakes in what the games are called
- They often don't list everything on the disk
- They have old items scratched off
- They are peeling and flaking, etc.
I found this great collection of 400+ original C64 game disk labels, as high resolution images. It got me to thinking, I should go through my disks and catalog and relabel them all. So far I've done 42 disks. I'm doing them in batches of 14 at a time, because the Staples labels I'm printing off have 14 labels per sheet. I've been tweeting about my progress, and the response is pretty positive. I frankly think they look great, especially compared to how they looked before.


That's been fun so far, and I'll just keep plugging away at it, 14 disks at a time, as I get the free time and inclination to sit down with them.
Read Errors
When I started this, which I'm calling the Great Disk Relabeling Project, I was confronted with a rather sad and worrisome discovery. Very many of my disks would not read properly. I'd put a disk in, the directory would sometimes fail to load. Try a few more times, and maybe the directory would finally load giving me hope, but then trying to load a file would end up with a read error halfway through. As I tried disk after disk, I had this sinking feeling that these boxes of disks I've had for years and years had finally given up the ghost.
Not all of my games are old though. I have acquired numerous recent games, some in digital only, but several boxed and on floppy: Sam's Journey, L'Abbaye Des Morts, Vegetables Deluxe, The Bear Essentials. And I was working on the PRG Runner utility for C64 OS. The PRG Runner utility allows you to create aliases on the App Launcher desktop that can reliably startup a game, be it from .D64 image, or with a swaplist, or from an original disk. To test this functionality, I was using my purchased physical copy of The Bear Essentials. That's when I noticed, that the drive was failing to read even this disk. And worse yet, the drive soon stopped working with everything. Even disks that it had been able to read just days earlier, I was getting non-stop read errors.
This made me think, well, maybe it's not the disks. Maybe it's the drive.
Let me give you the punchline up front. It is the drives, all three of my drives had similar issues. And after I opened them, cleaned them and tuned them, I've been able to continue on my relabeling project, and to my delight the vaste majority of the disks are in fact all still in perfect working order. Only a tiny handful of the disks have visible mold growing on their surface. I've set those few aside and I'll be dealing with them in a separate disk restoration project. For now, I want to dive into what I've learned about how the 1541 disk drive works. Along the way, I'll link to the tools and blog posts I found that showed me how to tune mine back up and get them happily humming along again.
The advances made by a disk drive
I was sitting around having a beer with an old friend and work colleague of mine, a couple of years ago. And we got to talking about how much of a technical leap forward disks were over tapes. And, having never used a tape drive before, he didn't really understand how the tape works or why it's so slow. On a tape, all of the data is strung out serially on one long strip. You ask the computer to load a program by name, and it starts slowly rolling through the tape looking for the magnetic start signature. Upon finding a start signature, it knows that a file header immediately follows. It reads in the header and gets a name. But, if the name isn't the one you're looking for, what else can it do? It has to keep rolling, slowly, through the complete data of that entire file looking for the next start signature. What happens if the file you're looking for is at the end of the tape? It has to roll through all the contents of all the other files before finally coming upon the one you're interested in.
Of course, the trick to speed this up a good deal is to write on the paper insert the counter offset of where each program begins. That way, you can rewind the tape at higher speed, clear the counter and then fast forward the tape until you get just before the program you're looking for, according to the counter. The computer and tape drive then find the file right away. But this is quite a manual process.
Disks solve this problem and many others. Instead of the data being laid out one-dimensionally down the length of a long wound up strip, the data on a disk is laid out two-dimensionally on a single flat surface. Finding the start of some data on a two-dimensional surface becomes a matter of knowing its two-dimensional coordinates. But you don't need to record these coordinates on a sheet of paper and specify them at load time, because the disk also introduces the directory. A directory is like a special kind of built-in file, whose start of data is always found at a known 2D coordinate, and which lists files by name and specifies each of their 2D start coordinates. Files can thus be accessed in random order by following a relatively simple procedure:
- Jump to the known 2D coordinate of the directory's first block.
- Start reading through the directory "file."
- When the filename is found, jump to the 2D coordinate listed with it.
- Follow the chain of discontiguous blocks, to reconstitute the file.
Done. Easy peasy. Much faster than rolling through a whole tape.
A Disk's 2D Coordinate System
The two dimensional coordinate system doesn't address each byte on the disk. It's more like how a street address gives you the location of a block of land. The coordinate system addresses blocks of data. Each block is 256 bytes big, and the coordinates are a track number unique to the whole disk and a sector number unique on each track. Unlike on harddrives (including the CMD HD and more modern storage devices) that abstract the relationship between sequential block addresses and the location on the physical media, the 1541 drive has no such abstraction.
Tracks are a series of physical concentric rings on the surface of the disk. And sectors are sequential divisions running around each track. The 1571 and 1581 work similarly, but they make some technological advancements and the numbers and locations of things are different. Therefore we can imagine pretty well how a 1571 or 1581 would work, but we'll stick with the 1541 because it is A) more common, and B) simpler and easier to understand.
The 1541 can only read a single disk side at a time. Flipping a disk physically upside down is the same as inserting a totally different disk, as far as the 1541 drive is concerned. When I describe the metrics of a disk I am really talking about one side of a disk. The other side may or may not even be formatted.
A 1541 disk has 35 tracks. It is important to note that the upper bound on the number of tracks is not an arbitrary software decision. There is a hardware-based reason that makes the mechanism able to access precisely 40 tracks. The 1541's DOS only uses 35 due to reliability issues with the higher track numbers. But we'll return to discuss this more soon. A custom DOS could make use of up to all 40 tracks, or it could make use of fewer than the standard 35 tracks. But there is no way for software to vary the distance between the tracks, and thus no way to increase the number of physical tracks that the hardware can reach.1
Track 1 is the outermost ring of the disk. Track 35 is the innermost ring. It should be easy to visualize that the innermost ring is shorter than the outermost. You would think there should be more storage space available on a physically longer track, and there is. The tracks from 1 to 17 are divided into 21 sectors each. Tracks 18 to 24 have only 19 sectors each, tracks 25 to 30 have only 18 sectors each, and lastly, the shortest tracks, 31 to 35 have only 17 sectors each.
| Track #s | Tracks | Sectors |
|---|---|---|
| 1 to 17 | 17 | 21 |
| 18 to 24 | 7 | 19 |
| 25 to 30 | 6 | 18 |
| 31 to 35 | 5 | 17 |
Let's do the math then:
17 * 21 = 357
 7 * 19 = 133
 6 * 18 = 108
 5 * 17 =  85 +
---------------
        = 683 sectors
One sector stores one block of data. This isn't just a difference of terminology. A block of data is 256 bytes. But a sector stores a block of data by encoding it within additional information on the physical disk surface to facilitate writing, reading, error checking and synchronization. On a freshly formatted disk there are 664 blocks free. The difference of 19 blocks is accounted for because the DOS requires a certain number of blocks to organize the data on the disk: The BAM, the directory, etc. We will not be getting into the higher level structure of the file system in this post. But we can at least see where the familiar 664 blocks come from, approximately.
The DOS, which resides in ROM in the drive, knows how to navigate the 2D coordinate system to find and follow the chains of blocks that make up a few standard built-in file types. The DOS also provides calls which allow a program to access any arbitrary block. Block Read is a command that orders the drive to read the contents of a block into a 256-byte buffer of RAM (RAM that is inside the drive). Then there are commands to manipulate the data in that RAM buffer, including reading it into the C64's own RAM. And a Block Write command orders the drive to write the contents of a 256-byte buffer (again, from the drive's own RAM) to any sector on the disk. These accesses are performed by specifying the track and sector address of the block.
Technically speaking, block reads and writes are all that are necessary for a computer to manage the full contents of a disk and its file system. The computer could manage the BAM and the directory, and the file block chaining, and do all those manipulations itself. The drive could be a very dumb device that merely reads and writes whole blocks of data, without any idea what is in those blocks. Any C64 can do this, today, and many commercial games and programs actually do just this to varying degrees. This is also (more or less) how current storage devices are managed by modern computers. The details of the file system are implemented in a software driver used by the operating system and executed by the computer's own CPU. The physical device needs only support a generic block read/write mechanism. This division of duties also facilitates multi-tasked access to the storage devices, because writes can be queued up in blocks, and blocks can be written out in arbitrary order, one block from this file the next block from a different file. Since the organization of the blocks is managed by the computer, it's all the same to the storage device. A modern storage device doesn't need to know which block belongs to which file.
The only reason a C64, an 8-bit computer, doesn't manage its storage devices this way, is because there just isn't enough space in the computer. The full DOS of a 1541 drive (stored on its own 8K ROM) would have to be inside the C64. But then, what about the 1571, 1581, and the later devices like the CMD FD, CMD HD, RamLink, IDE64, and SD2IEC? On a modern computer, you could just install a new device driver or a new file system driver or both to support newer devices. On a C64, whose own OS is on the mainboard in a ROM, and whose addressing space is already not only packed but overloaded, this wouldn't work. So the details of the DOS of each device are farmed out to those devices themselves.
Knowing that the C64 can make block-level reads and writes, however, is instructive. Because, when the C64 farms DOS commands out to the drive, the drive is like its own mini C64—a 6502 computer, with RAM and ROM and I/O—that performs its own block-level operations on the data. The drive's hardware is responsible both for encoding/decoding the data and directly controlling the drive mechanism, but also the higher level DOS functions that implement the file system.
Not only does the 2D coordinate system address full sectors, but the drive manipulates data in full sector increments, too. Roughly (very roughly) like how the CPU doesn't manipulate individual bits in memory, but rather reads in byte-sized chunks, manipulates the bits within the byte in the accumulator register and then writes the full byte back out to memory. The drive can't just spin the disk around and write out one solitary bit in the middle of a sector. The reason is because there isn't a simple one-to-one correspondence between a bit of data and a charge of flux on the disk surface. Each nybble is encoded using a scheme that facilitates the physical limitations of the media but causes neighboring bytes to be involved as well. Then the entire sector is wrapped with metadata, including a checksum that is computed from a combination of all of the data in the whole sector. So data has to be moved to and from the disk in sector-sized chunks.
Essentially, the disk spins, and as a portion of a track whizzes past the head it reads in a sector of encoded data, which is always contiguously stored on the physical media and very carefully spaced out. The data is stashed into a RAM buffer and later decoded back into the actual data to be sent to the computer. From there the individual bytes can be accessed and manipulated, and then that full buffer can be written back out, either to the same sector whence it was read or to any other appropriate sector. Writing the data back to the disk requires the 1541's CPU to first re-encode the entire sector, including a new checksum.
Finding a Physical Sector
Now that we know how the surface of the disk is carved up into tracks and sectors, the question becomes, how does the physical mechanism find a sector? We have some coordinates, say, Track 18, Sector 1. Good. Now, how does the head get to the spot on the disk's surface that is that track and sector?2
There are two motors in the drive mechanism, an analog one and a digital one. An analog DC-motor freely rotates when an electrical current is supplied. Typically the way this works is that, within certain limits, the more current the motor receives the faster it spins. It's analog for the very reason that you can smoothly increase or decrease the resistance, which will smoothly slow down or speed up (respectively) the motor's rate of rotation.
The other motor is a stepper motor, which is a digital device. Inside the stepper motor is a set of electromagnets, an even number, distributed evenly around the axis of rotation. When a pulse of electricity is supplied, the motor rotates precisely one step, realigning at the next electromagnet. Stepper motors come in different varieties, some have 12 steps, or 24, or 72 or more. Suppose we have a motor with 12 steps, evenly distributed around 360°, that means each pulse of electricity will cause the motor's shaft to rotate precisely 30° (360 / 12 = 30.) You can read more about stepper motors and how they work here.
Now let's return to the 1541.
The analog motor rotates the disk, and the digital motor moves the read/write head in discrete steps back and forth, over the opening in the disk housing, across the radius of the disk. Let's measure the opening in the disk housing, and see that the radius of the disk available is approximately 1.25". We know that the 1541's mechanism can technically reach 40 tracks, (even though only 35 are used due to unreliability of the higher tracks.) So we can know that the head needs to be moved to 40 different discrete offsets within that 1.25" radius.

Measuring the available disk radius, ~1.25"
That means the head should move approximately 0.03125" to hop from track to track. Now, I don't actually know how many steps there are in the 1541's stepper motor, but it doesn't really matter because we're not building a 1541, we just want to understand in essence how it works. So let's see how it would work if it had just 12 steps. If one step needs to move the head 0.03125" and one step is 1/12th (or 30°) of rotation, then the circumference of the shaft would have to be 12 * 0.03125" or 0.375".
   12.00000
x   0.03125
-----------
    0.375"
That's a bit small, let's see how it would work if it had 32 steps.
   32.00000
x   0.03125
-----------
    1.00000"
That would work out to be very close to 1". The shaft itself, clearly, isn't going to be 1" in circumference, but all you'd have to do is fix a wheel to the shaft that has a circumference that is precisely as long as the distance the head should move per step, times the number of steps in the motor.
Now let's see what we find when we take the roof off a 1541 drive.

Labeled parts of 1541 mechanism, head and stepper motor assembly.
We cannot see the analog motor in this image. But we can see part of the stepper motor. It's quite large, probably close to 3" in diameter. And you can see that the shaft sticks up from the middle of it. Just as described, a precisely sized wheel is fixed to the shaft to provide the right distance for the head to jump with each step.
Earlier I mentioned that the number of tracks and the distance between tracks is not controlled by software, but by immutable hardware. Well, that's what we're seeing here. The stepper motor has the number of steps it has, fixed in its hardware. The wheel is the size that it is. And each discrete step determines how far the head will move. Ergo, it is impossible for an act of software to vary the number of accessible tracks or their positions relative to each other.
On the upper left we see that the head is mounted inside a head assembly. That assembly is mounted to two rails, along which it can slide, although we can only clearly see one of the two rails in this image. A metal strip goes around the stepper motor's wheel, and around another free rotating wheel, with a tension spring to keep it taut. The head assembly is fixed to the side of the metal strip, and what you can't see here is that a screw also passes through the metal strip and into the wheel so the strip can't slide.
Sensors, Alignment, and What the Motors Don't Know
Although we cannot see the analog motor in the image below, suffice to say that it is on the left underside and connected to the spindle in the middle that rotates the disk. The brown circuit board on the left, in part controls the analog motor.

Labeled parts of 1541 mechanism, spindle and analog motor control.
It is an analog motor, but it always spins the disk at the same speed. This should be as close to 300rpm as possible. And according to what I've read (namely here, Retro 64 Blog's excellent article on 1541 drive maintenance,) the motor should not deviate from 300rpm (faster or slower) by more than half a rotation per minute. There are different reading routines, and some are more tolerant than others about the speed that the disk spins. But if it doesn't spin very close to 300rpm, there are some fast loader routines that will certainly fail to work correctly.
We should think about the math on that one for a moment. Supposing that it is perfectly on 300rpm, that's 300 rotations in 60 seconds, or 5 rotations per second, or 1 rotation per 200ms. Around the (lower numbered) outside tracks, there are 21 sectors per track. 200ms divided by 21 tells us that a sector in one of the outer tracks passes by the head in approximately 9.5 milliseconds, so even if everything else were magically infinitely fast, it takes 9.5ms for only 256 bytes of data to physically flow past the head. To see how much data flows past the head per second, that's 5 rotations * 21 sectors, or 105 sectors per second. After decoding a sector holds 256 bytes or actual data. So, 105 * 256 is 26,880 bytes or 26.25KB per second. According to this Lemon64 thread, Fast loader shootout, Prof. DOS is able to transfer 26,670 bytes per second. There you go. That is very nearly as fast as physically possible, given the rotational speed of the disk.
Very cool.3
It's an analog motor that always spins at the same rate, therefore the time it takes for a given track to make a complete rotation is stable. Part of the tuning that I performed on all three of my 1541 drives was to adjust this rotation speed. In the image above I've labeled the blue variable resistor. This can be turned to adjust the resistance which affects the rpms of the drive motor. It is very sensitive, and requires only slight adjustments. Typically you make the adjustments (very carefully) while everything is powered up, and running one of several 1541 diagnostics software packages. This is described in more detail in the Retro 64 Blog article mentioned above, so I'm not going to detail that here.
Imagine now that the disk is being rotated while the head is over a track. We'll come back to how the head identifies the track in a moment. The first question is, how does the head know where along that track it is? This is the purpose of the, so called, "Index Hole," right? Well, let's investigate that. To the side of the large central hole used for aligning and spinning the disk there is another smaller hole in the disk housing. If you manually rotate the disk inside its housing, eventually you'll come upon a hole punched through the disk itself. Shown here.

1541 floppy disk with labeled index hole.
In principle this hole works much like how a ball-mouse's sensor works. In the mouse, the ball rolls, which rotates an axle, which is connected to a toothed wheel. The teeth of the wheel rest between a light sensor on one side and an LED on the other. As the wheel rotates the teeth and the space between the teeth alternately mask and expose the sensor to the light from the LED. The information on the sensor informs the electronics about how fast the mouse is moving, and in what direction, along that axis. In a disk drive, there would also be a light sensor and an LED on either side of the disk. When the index hole passes between them the sensor picks up the light and informs the electronics of the orientation of the disk.
Most 5.25" floppy disks have this hole, but as it turns out, the 1541 disk drive doesn't use it. In the image of the mechanism above, I've labeled "Missing LED." Clearly, the manufacturer of this mechanism, Mitsumi Electric, provided these to multiple computer manufacturers. But in the case of Commodore and the 1541, it doesn't need this syncing information and so the LED and sensor have been left out probably to save cost. Even if the mechanism actually had the LED and sensor there would be another way to know that they are not being used. Some disks have two index holes. Actually only one index hole in the disk, but two openings in the disk housing through which the index hole can be seen, one on each side of the large central hole.
The point of the second hole in the housing would be so that the index hole could be detected when the disk is flipped upside down. However, nearly all of the disks I have, have a hole only on one side. And yet, when we flip the disk upside down, it still works on the 1541. As you can see, when a disk is upside down, the single hole in the housing, for the index hole to be seen, isn't even positioned under where the LED would be. Yet it still works perfectly.
How does it know where it is around a track?
To be honest, this gets technical fast. And I want to keep it at a relatively high level. I mentioned earlier that the 256 bytes of a block have to be encoded and decoded to be written to and retrieved from the physical disk surface. The main reason for this is because the transmission of data between the disk and the disk drive, via the head, is much more similar to a telecommunications transmission than it is to the highly reliable lockstep machinery of the CPU accessing memory. Think about how data is transmitted via RS-232 for a moment. Assume both sides have already been configured to agree with each other about the rate of transmission. When a byte of data is available there is a start signal. The C64 then knows the rate at which the bits of that byte will be available, and samples the line at regular intervals, drawing in one bit at a time. Timing is important, but it's okay to be off by several percentage points, because the sender and the receiver only have to remain in sync for up to maybe 10 bits. After that, the next byte starts after a new synchronizing start signal.4
On the 1541, rather than synchronizing to each byte, as RS-232 does, it synchronizes to each sector. The encoding scheme used on the disk is called Group coded recording, or GCR. In this scheme, there are multiple levels of abstraction. First, the magnetic flux on the disk can have either a positive or negative charge, but it isn't as simple as saying, okay every on-bit of the source data will be written as a positive charge and every off-bit will be written as a negative charge.
Why can't it just be this simple? The problem is that a long series of off-bits (such as a string of data full of 0s, which is very common) would result in long stretches on the disk having negative charge without any clear boundaries between the bits. It's very difficult to stay synchronized, or to know if you've fallen out of sync, in a sea of hundreds or thousands of bits that are all in the same state. Instead, each on-bit is stored as a transition from either positive-to-negative or negative-to-positive charge, but with a twist that guarantees that a transition will occur after no more than a maximum of 2 off-bits. This scheme, of which GCR is a variant, is known as Run-Length Limited.
Essentially, again without getting too deep into the weeds, each of the 16 possible combinations of 4 bits (each nybble) is assigned a 5-bit pattern in which no more than 2 off-bits occur in a row, and no more than 1 off-bit occurs on either end of the pattern, such that when these 5-bit sequences are packed together there are never more than 2 off-bits in a row within or between them. There are several side effects of this encoding scheme:
- There are never more than 2-bits in a row without a transition in magnetic flux
- Every real byte requires 10-bits of raw storage on the disk
- There are never more than 8 on-bits in a row, in the encoded form
The first point is what allows the read head to stay synchronized with a disk that is spinning under the influence of an analog motor whose timing may not be perfect. The second point means that every 256 bytes gets expanded to 320 bytes. The default Commodore DOS implementation reads 320 bytes of GCR encoded data into a RAM buffer in realtime, and then after the complete read it goes through a second phase that converts the GCR encoded 320 bytes into the 256 bytes that can be operated on. The third point above may at first seem like a mere side effect of how the GCR encoding works. But it is an important side effect. Because the GCR encoding guarantees that in the data stream there will never be more than 8 flux transitions in a row, the 1541's DOS uses this to implement the sector sync markers. A sector sync marker indicates where a sector begins on a track, and functions similarly to the start signal in an RS-232 transmission. A sector sync marker is made of 10 flux transitions in a row, a sequence that cannot otherwise ever occur. Very clever.
As often, PageTable.com has a brilliant article called, Visualizing Commodore 1541 Disk Contents. You can see that each sector actually has two sync markers. Immediately following the first sync marker is some metadata about the sector, including its sector number and a copy of the disk's ID. Following the header is a second sync marker, and following that is the encoded data for that sector. So the indexing hole is not used at all. The sectors are found by searching for the sync markers while the disk spins by.
It's so fascinating to me. There are echos of the tape drive here. Think about the tape, it's a long strip of magnetic media, and files start at arbitrary places along that strip. There are no physical indexing holes in the tape to orient the drive to where it is. Instead, as the tape rolls through, the computer is searching for a sync signature, after which comes a header, and then the data. The tape is just one long track. Whereas the disk has multiple tracks, that connect end-to-end in a circle. The data on the tape moves past the head via an analog motor, at a known rate. So too, a track of a disk moves past the head via an analog motor. The rate of rotation is constant, and the rate that data is written to the track is known (although different tracks have different known rates.) Each track of a disk is like the one strip of a tape. The big difference is that the track of a disk moves past the head much more quickly, and because it's a circle, it never needs to be rewound.
How does it know what track it is on?
If the head is on a track, we know how it finds a sector, but how does the head know what track it is on? Although the stepper motor is a digital device—it moves the head in precise and discrete increments or steps—it has no internal representation of what step it's on. There is no sensor that informs the electronics about the position of the head. Additionally, you can turn the drive off whenever you want, so when the drive is turned on the head could be anywhere. What tells the head where it is?
Well, here's one way: We know how it can scan for a sector on a given track and, as it turns out, every sector header stores both the sector number and the track number. So it can seek out a sector, read its header and bingo, now it knows its current track. At that point, the software maintains the current track, and simply keeps the two synchronized. It increments its own internal track number and it sends one forward step signal to the stepper motor. And, boom.
But what happens if the disk is damaged? Or what happens if the disk is formatted for a different drive? Or what if the disk isn't formatted at all? There's a solution for this. The drive can simply step the stepper motor down 35 steps. If the head started at step 35, it'll end up at 1, from there the drive sets its internal representation as 1, and away it goes keeping them in sync from then on. Ah, but what happens if the head didn't start at track 35? Maybe it was only at track 25.

Close up of the stepper motor's wheel
Here we have a close up of the stepper motor's shaft and wheel connected to that shaft. You can see that there are two protrusions rising up from the wheel. And at the back is a piece of metal called the head stop. If the stepper motor tries to rotate the head past where it is able to go, those protrusions strike the head stop and prevent the shaft from rotating. This isn't bad for the motor, because they are just electromagnets trying to rotate it and if they meet resistance, then after a certain threshold the shaft will lock back into precise position but not having rotated. Thus, if the head was on track 25, and the drive orders the stepper motor to step back 35 times, the wheel protrusions will knock against the head stop 10 times, after which, the software and hardware are synchronized at track 1.
The famous drive knocking sound! Finally explained. I've known for years that it's caused, generally, by the head bumping up against the end, but I've never understood why that was necessary. Now it makes a lot of sense.
Random things we now know
Initialization
A couple of points should be brought up here. Not every DOS version, that shipped with the various drive models, have exactly the same behavior. Some drives perform a head knocking—physical track synchronization—immediately after being turned on. Others seem to just scan the current track and grab the track number from the first sector they come upon. In any case, there are times when the head seems to get "lost". I'm not sure what causes this, and it might only afflict those drives that don't perform the physical sync on power up. But the age-old trick has been to send the drive the initialize command.
open15,8,15,"I":close15
This command probably performs other software steps, such as closing files and reseting RAM vectors, but it also has the head perform a physical sync which usually results in the head knocking against the stop.
Formatting
Before formatting a disk, a fresh disk may have no data on it at all, or it could be formatted for some other computer. Now we have a pretty good idea about what the drive actually has to do to perform a format. Because on a fresh disk it can't locate any track information, it is going to do a phyical sync with track 1, giving you a head knock. Then it's going to move systematically from track to track and lay down the sector sync marks, two per sector, and write the sector header data into each sector's header. This includes the sector number, the track number, a copy of the disk's ID and a header checksum, plus some padding. Then it will write the directory header sector to Track 18, Sector 0, and then initialize the first directory block at Track 18, Sector 1, and then it will write the BAM sector out, indicating which sectors of the disk are used and which are available for later allocation.
This also explains another little mystery. What is actually different between a "full" format and a "quick" format. The only difference in the command is the presence or absence, respectively, of the disk ID.
open15,8,15,"n0:full format,id":close15
open15,8,15,"n0:quick format":close15
The full format takes so much longer, because it has to lay down every sector sync mark and header for all 683 sectors. A quick format can be performed on a formatted disk because the sector markers and headers are already there. It only clears the directory, and the BAM, and writes the new disk title into the directory header block. This also explains why it is that you can't change a disk's ID without doing a full format. Because the ID is written and checksummed into the header of every sector.
Some physical attributes
Recall that earlier we talked about how many steps the stepper motor might have. I took some wild stabs at the math, based on approximately how large the wheel appears, divided by how many steps it needs to take, times the approximate distance between each step.
12 steps was much too small, 32 was a more reasonable guesstimate. But actually we have more information based on the head stop. Because the head stop prevents the wheel from make a complete 360° rotation, but we know the mechanism can technically reach 40 tracks, we know that there must be at least 40 steps between the two wheel protrusions. Again another guesstimate, it looks like there are approximately 240° of rotation between the two protrusions, which would mean the stepper motor's total number of steps is probably closer to 60.
Misalignment
Last but not least, let's talk about the famed misalignment problem. Apparently, a true misalignment is relatively rare. And that's fortunate, because dealing with a misalignment is much more involved than what I had to do.
All three of the 1541 drives I had were experiencing reliability issues of varying degrees. But I was able to bring all three of them back to normal healthy operation without having to do anything about alignment. The three steps I took with each drive are:
- Adjust the rotational speed of the analog motor back to 300rpm
- Clean the head with a Q-tip and some alcohol
- Clean and lubricate the head assembly's rails
I shan't go into details about how to do this, because, the Retro 64 Blog post I read, Commodore 1541 Disk Drive Maintenance, already covers this so nicely.
So what is a misalignment, then? The wheel for moving the head is connected to the stepper motor's shaft. A misalignment is when the wheel gets rotated on the shaft. That's very bad. Because now those precise digital stepper motor positions no longer place the head directly above a disk's tracks.
It is apparently unworkable in practice to rotate the wheel back to its original alignment on the shaft. The only solution for fixing an alignment problem is to rotate the whole stepper motor, slightly. This involves more deeply disassembling the drive, loosening the screws on the stepper motor and rotating it while everything is powered up and running. There is a not insignificant risk of electric shock. Additionally, after successfully rotating the stepper motor, the head stop will then not be in the right position, and so this may need to be augmented with some extra bits of metal. Frankly, it sounds like a huge pain. So I was very glad that my drives started working well after the simple and much less intrusive maintenance procedure.
Here's the thing about misalignment. It was much more prone to happen in the older, so called, ALPS mechanism. And much less likely in the later newtronics mechanisms. These can be easily identified by the type of door hinge. The wide flat rectangle that uniformly pushes down, and spring ejects the disk when opened, is the older ALPS mechanism. The smaller lever that rotates 90° and has no spring ejection, is the newer newtronics mechanism. The main cause of misalignment is that the internal power supply of a 1541 drive heats up the inside. The shaft and the wheel are made of different types of metal which cause them to expand at different rates which can cause the wheel to become less strictly connected to the shaft. Years of head knocking under these conditions can bump the wheel out of alignment on the shaft.
An ounce of prevention is worth a pound of cure, as they say. You should not stack your running 1541 drives. The ventilation slats in the top are there to keep the drive cool. If these are blocked, the drive will heat up which could, over time, damage the mechanism, but it will also shorten the life of the chips. It's okay to stack them if they're off, but they really should not be stacked while running.
Further to this, if you're not going to be using your 1541 drive, you should leave it off. This reassures me about why I wrote the Drives utility for C64 OS. You can open the utility (from within any application), flip on (or off) your 1541 drive, and rerun the drive detection scan. That'll update the detected drives table and allow applications to recognize that the drive has joined (or left) the bus. This way you can boot up with your SD2IEC, or IDE64 or CMD HD, and then turn on your trusty old 1541 when you need it, without having to reboot.
And the very last thing I wanted to mention. The alignment software, used to check the alignment of the head and the rotation speed and other details, always asks you to use a commercial diskette. For example, use the original 1541 test/demo disk, is one recommendation. Sounds good, but when I began this adventure, I didn't understand what difference that would make. Now I understand. The alignment software is testing the alignment of the head by checking to see whether the head is positioned above a track that is on the disk. But we now know that tracks are written onto the disk by the drive's head at the time when the disk is formatted. If you use a drive that has a misaligned head to format a disk… You're inadvertently producing a misaligned disk!! Ack! If you put a misaligned disk in a well aligned drive, it will make it look as though a well aligned drive is misaligned.
Commercial disks are usually mass-produced. Which means they aren't written out simply using a 1541 disk drive, but with potentially much more reliable, industrial, equipment. If you test your drive's alignment against a commercial disk, such as the 1541 test/demo disk, you can be certain the tracks will be found where they are supposed to be.
Final Thoughts
I know that this material is scattered throughout the internet, and has been around for decades, but hopefully someone will find my expositions of the 1541 drive to be useful and informative. I learned a lot about how it works, and solved personal mysteries that I've wondered about since I was a child.
- Some games and demos do make use of all 40 tracks. They might get away with it because they only use the higher tracks for reading and not writing. I'm not sure where the unreliability part comes in that made Commodore stick to using only 35. Nonetheless, the positions of the tracks and distance between tracks is dictated by the immutable hardware.
- On the 1541, track 18 sector 1 stores the first block of the disk's directory. So this sector is going to be quite frequently accessed.
- Remember, even though a block stores 256 bytes, the PRG file format uses 2 of those bytes internally to link one block to the next. So only 254 bytes per block are available as data to be sent to the computer. In other words, Prof. DOS is essentially at the very limit of what is physically possible. Doubly cool. Note: To transfer this quickly, to the computer, it requires additional hardware to support parallel data transfer.
- If you're interested in a primer on how RS-232 works, I wrote about it approximately halfway through this post I wrote about network chess for C64 OS. Look for the heading "Networking" to get to the part about RS-232 if you aren't interested in the discussion about C64 OS networking or Chess.
Do you like what you see?
You've just read one of my high-quality, long-form, weblog posts, for free! First, thank you for your interest, it makes producing this content feel worthwhile. I love to hear your input and feedback in the forums below. And I do my best to answer every question.
I'm creating C64 OS and documenting my progress along the way, to give something to you and contribute to the Commodore community. Please consider purchasing one of the items I am currently offering or making a small donation, to help me continue to bring you updates, in-depth technical discussions and programming reference. Your generous support is greatly appreciated.
Greg Naçu — C64OS.com