
C64 OS USER'S GUIDE
Chapter 7: Utilities: PRG Alias
This section of the User's Guide focuses on how to use PRG Alias Maker to create PRG aliases to games. It can also be used to create aliases to other sorts of C64 software.
This guide covers how to add PRG aliases to an App Launcher desktop, how to launch a game or program from the PRG alias, and how to quickly jump back into C64 OS.
What is a PRG alias?
To launch regular Commodore 64 software from within C64 OS you use the PRG Runner Utility. PRG Runner reads and understands PRG aliases and can act on the information contained within them. In the simple case, a PRG alias is not required. However, PRG aliases let you do lots of cool things.
PRG aliases are small metadata files that connect a filename of your choice to a non-C64-OS program installed anywhere on your C64; on any device number, in any partition, at any subdirectory path. The alias encodes the installed location, the name of the file to be loaded and run, how to run it, and what controller ports the program uses.
More advanced options include the ability to specify a disk image to be mounted, or a swaplist of disk images to be assigned. It can specify whether the device where the program is installed needs to be switched to device 8 first, and other information.
A PRG alias can be put on an App Launcher desktop and assigned a color. Aliases can then be positioned and grouped according to your preference. For example, you might put puzzle games together in blue and platformers together in red. The desktop represents how you want your programs to be named and organized, without being bogged down by the technical details of where the software is installed or how to load and run it.
When the alias is opened, PRG Runner correctly loads the program by first rearranging device numbers, assigning a swaplist, mounting a disk image, and ensuring other required criteria are met. It even reminds you of what joystick port to use. Have a joystick port switcher? You know to press the port-swap button.
With an REU and Fast Reboot, you can jump back into C64 OS in mere seconds. And you're ready to hop into a different game or program.
Creating PRG Aliases
From File Manager, first navigate a tab to the system's prg aliases directory. Choose System from the Go menu, or press F2. Then double-click the subdirectory called "prg aliases".
Initially this directory is empty. PRG aliases created using the PRG Alias Maker Utility are saved to this directory.

PRG aliases directory
Find your installed software
In a different tab, navigate your devices and their file systems to locate where a game has been installed. In this example, if the games are single-load files they are installed in partition 1 of my SD2IEC, on device 10, in a subdirectory called "games". The C64 OS file reference to this place looks like this:
10:1:://games/
Some games are multi-file. To keep the files together they are organized in a subdirectory of the games directory. Because many games come originally on their own disk, and the disk has a label to indicate what it is, the filenames do not necessarily bear any ressemblance to the name of the game.
For example, The Nightland is composed of two files: "loader" and "story". These two files belong together but neither of those filenames indicate anything about the name of this game. These two files are therefore collected together in a subdirectory called "Nightland". The C64 OS file reference to the boot file for The Nightland is as follows:
10:1:loader://games/Nightland/
Open PRG Alias Maker
Open PRG Alias Maker. Choose "Utilities" from the Utilities menu at the top left, or press SHIFT+CONTROL+COMMODORE+U. This opens a panel that shows all of the installed Utilities.
Scroll down and double-click PRG Alias Maker.


At the top of the panel is the name field. This is the name of the PRG Alias that will be created. Since they are created in the same prg aliases directory, all PRG Aliases must have a unique name.
Original is a field that shows a C64 OS file reference to the selected file. Below that is a set of tabs, Options and Advanced. We'll look at Advanced later in this guide. At the bottom of the Utility is an Overwrite checkbox and the Create button. Once all required information has been filled in, you click the Create button to capture the information in the new PRG Alias file. Check the overwrite button to confirm that you want to overwrite any existing PRG Alias with the same name.
PRG Alias Maker's panel may be positioned in an inopportune location, drag it to the left side of the screen and use the vertical splitter in File Manager to make the list of files appear to the right of the Utility.
Create a PRG alias
When you click a file in File Manager, that filename is filled into the Name field. In this case, we've clicked on lester-v1.1. Sometimes a program's filename is just as you want it. But sometimes it has a version number, or the name of the coder or group. Sometimes the name will have dashes where spaces would be preferable and often, because a Commodore64 starts in the uppercase/graphics characterset, developers prefer to use only lowercase characters (which display as only uppercase characters from the READY prompt.)


C64 OS uses a lowercase/uppercase characterset, so it is often more attractive to name the alias with mixed case. In this example, the file is named:
lester-v1.1
This shows three different undesirable traits: All lowercase, a dash between the name and the extra info, plus the extra info itself that bears the version number. As a single file game, we could just rename the original file. But this is undesirable for its own reasons. If we mix the case, it won't look as good from the READY prompt. If we remove the version number, then we don't know what version of the game this file is anymore. And in some rare cases the game or program might actually care what its own file is named.
It's best to leave the original files named as they were by the developer. But the PRG Alias lets us assign our own name. And this is just what "alias" means.
Alias
1) noun. a false name used to conceal one's identity; an assumed name. https://www.dictionary.com/browse/alias
Change the name in the name field as you want. In this example it is renamed to:
Lester
The original field is read-only. It shows the C64 OS file reference to the selected file.
Under the options tab, there is an option to swap the device number to 8. If the device number where the game is installed is already 8, this option doesn't do anything. In this case, the device number of the SD2IEC is 10, so checking this box would cause the device to be swapped to device 8. However, for this game, changing the device number to 8 is not necessary. This checkbox is unchecked by default.
The "Start with RUN" checkbox is checked by default because most programs are started this way. If you load the program from the READY prompt, and then type list, if it lists any BASIC program of any kind, even just a single line like this:
10 SYS2064
Because you start this program by type RUN, this checkbox should be checked.
There are programs written entirely in assembly and which must be loaded with the extra ",1" and then must be executed by using a SYS command. For example, the "monitorc" machine language monitor that's included in the //os/c64tools/ directory. It is loaded and run in one of the following two ways, without or with JiffyDOS:
Without JiffyDOS:

load"monitorc",8,1
sys59152

With JiffyDOS:

£monitorc
Because a program like this must be started by explicitly issuing the SYS command, or using the special JiffyDOS £ load-execute command, in PRG Alias Maker you would decheck the "Start with RUN" checkbox.
The joystick port number checkboxes are optional. But if you know the game uses a joystick in port 2, it's nice to check this so that you see it and are reminded of it later in PRG Runner.
To create the alias, click the "Create" button. And that's it.


After creating an alias, PRG Alias Maker stays open and its last settings remain selected.
To recap, creating an alias to a single-file game is very easy. We simply click the game called tiny quest. The name field is updated to the name of the selected file. We edit it slightly to name it "Tiny Quest". This is not necessary, it's purely an aesthetic preference.
Swap to device 8 is unchecked by default. Start with "RUN" is checked by default. Just click Port 2. In this case, Port 2 was already checked because that's how it was set for Lester.
Click "Create" and we've created another PRG Alias in just a couple of seconds.

Why not create another one while we're here. Click ooze v1 and rename it to "Ooze". Click "Create" and we've created another PRG Alias. It's that simple.
Review the PRG aliases
Switch File Manager tabs to the one that is in the //os/prg aliases/ directory. Notice that it still appears to be empty. Choose Refresh from the Options menu, or press CONTROL+R.


To view the metadata associated with these aliases, choose PRG Runner from the File menu. You can leave PRG Runner open, like a floating palette, and click on the different PRG aliases that you've created to see their metadata.
Not all of the information recorded in the alias is displayed by PRG Runner, but the essential information is displayed. The device, partition and path of the original. The filename to load and run. And the joystick port to use.
Create an alias to inside a disk image
Before launching any of these new PRG aliases, let's look at a more complex example, and more advanced features of PRG Alias Maker.
Back in the other tab where the games are listed, navigate to a place where you store some games or programs in disk images.
Mounting disk images
In C64 OS, you cannot mount a disk image to the same partition where C64 OS is installed, as this cuts off the Commodore 64's access to the C64 OS system directory.
Every C64 OS System Card ships with 2 partitions. The first is called "C64 OS" and is where the system is installed. The second partition is called "Images" and is intended to be where you store and organize your disk images (.D64, D71, D81, DNP.)
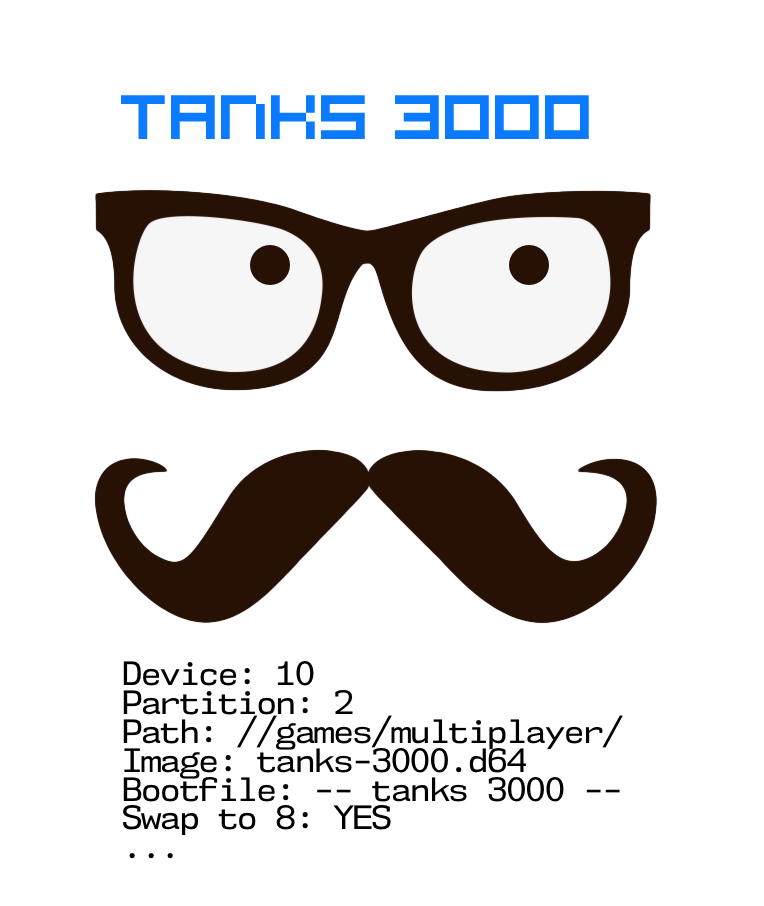
In the following example, we navigate to the SD Card's second partition and into the games subdirectory there. A number of .D64 disk images have been copied to this partition. See on the status bar that the path is shown as:
10:2:Tanks 3000.d64://games/


In the file system, we will select the disk image file. But this isn't the name of the program to load and run. That file is inside the disk image. In some cases we could load and run the first file in the disk image. In that case, we could use the "*" character, familiar to all C64 users from the nearly ubiquitous load command:
load"*",8,1
run
To be more complete, these instructions show how to get the actual filename to load. Double-click the disk image. This presents the Mount Utility, shown above right. It verifies that this is in fact a disk image and that this is a valid place where the image can be mounted. Click the "Mount" button to proceed.


File Manager sorts directories, either alphabetically by filename, by file size or type. This is convenient for finding a file by name, but we want the order of the filenames as they would appear in the directory from the READY prompt.
Choose from the menus, View → Sort By → Disk. We can now see which file is listed first. In this case we want to load the first listed file, but that is not always the case. Mounting the image and sorting by disk order lets us confirm this.
Sometimes a filename uses special characters, such as PETSCII graphics characters that you can't type in C64 OS, or trailing spaces that you can't notice in File Manager. To correctly and reliably get the name of the boot file, it's safest and easiest to copy the filename to the clipboard.
Choose "Info..." from the File menu to open the File Info Utility. Select the boot file and click in the name field in File Info. Press COMMODORE+A to select all, then COMMODORE+C to copy the text to the clipboard.


Although it is unnecessary to confirm the contents of the clipboard, it can be fun to do so. The Clipboard Utility is in the Extras submenu of the Utilities menu. Or press SHIFT+CONTROL+COMMODORE+C. The Clipboard Utility shows that the name of the file has been copied to the clipboard.
Close any open Utility and unmount the disk image by choosing Unmount from the Options menu.


Open the PRG Alias Maker Utility again and select the Tanks 3000 disk image.
Notice this time that the file reference in the original field is a reference to the disk image itself, not to the program file we want to load and run. Mounting the disk image takes an additional step.
In the Options section, the only thing we need to check on is both joystick ports since this is a multi-player game. This is also a game from the modern era and so swapping to device 8 is not necessary.


Rename the alias to just "Tanks 3000" intead of "Tanks 3000.d64".
Select the Advanced tab. By default, the checkbox "Shares IEC Bus" is checked. Most software can run while other devices are active on the IEC bus, but there is some software which implements a custom IEC protocol, typically for software speedloading, where other devices on the bus interfere with the protocol. A notable example is the game Sam's Journey.
If you typically have only one device on the bus this can be ignored. If you have more than one device on the bus, this is checked by default and only needs to be unchecked in those rare circumstances where the program requires that only a single device be active.
Finally, check on the box that says, Mount Image/List. When this is checked a new field appears labeled Boot File. This field takes the name of the boot file that is found inside the disk image. That name is already on the clipboard, so click on the boot file field and press COMMODORE+V to paste. Click "Create" to create this PRG alias.
Launching Programs from PRG Aliases
Now that we've created a number of PRG aliases, it's time to see how to launch the programs that the alias refer to.


Select the File Manager tab again that is at the prg aliases directory. This will be missing the latest Tanks 3000 alias. Choose Refresh from the Options menu again, or press CONTROL+R, to update the directory listing.
There are 3 types of item that can be opened that keep you within the C64 OS environment.
- Applications
- Utilities
- Documents
From File Manager, each of these are opened using one of the 3 standard ways.
- Double-click the item
- Select the item, choose Open from the File menu
- Select the item, press COMMODORE+O
If it's an Application, C64 OS launches that Application. If it's a Utility, C64 OS opens that Utility in a window above the current Application. And if you attempt to open anything else, C64 OS considers it a document and opens the Opener Utility, which tries to determine which App or Utility should handle opening this type of document.
Determining a document's type depends on a combination of the CBM file type (SEQ, PRG, etc.) and the filename extension (.txt, .sid, .koa, .cgx, etc.) The PRG CBM file type alone cannot be used to determine that a file is a C64 program. It just doesn't mean that. What PRG means is that the file's data on the disk is preceded by a 2-byte load address. This could be, though, a chunk of SID audio that needs to be put at a specific place in memory. Or it could be a graphic format like Art Studio or Koala, where those original drawing programs load and save their data to a fixed location in memory.
Additionally, C64 program files only very rarely have a filename extension. Even then, there is no consistency about what the filename extension should be. This was simply not a standardized practice throughout the commercial life of the C64, and it's still not a standardized practice today.
It is possible to choose to give all of your PRG aliases a standard file extension. The C64 OS standard extension for a PRG alias is ".pa". The list of standard file extensions recognized by C64 OS is found in the OS itself, here:
//os/s/t/

where,

//os/s/t/:pa.t

says:

;PRG Alias. PETSCII text format.
The list can also be found on the OpCoders c64os-dev github repository, here:
https://github.com/OpCoders-Inc/c64os-dev/tree/main/include/v1.07/os/s/t
You may use the Opener Utility to assign PRG Runner as the opener for the .pa extension or any other extension of your choice. See Chapter 6: File Manager → Open a file.
However, there are a few downsides to depending on the standard document open mechanism and using the .pa extension.
- It doesn't help when trying to open a game or program directly (without using a PRG alias.)
- Going through the Opener introduces a delay, since the Opener has to be loaded first and then determine that it should open the PRG Runner Utility.
- If an extension is used, there are fewer characters left for the rest of the filename.
- Any extension on the PRG alias will be displayed on the App Launcher desktop, and this looks unsightly.
In light of all of this, the preferred standard practice is to leave PRG aliases without any extension. This mirrors the general standard that documents and data files have extensions which express the data type while executables have no extension. Applications and Utilities in C64 OS have no extension, C64 programs that load and run from the READY prompt generally have no extension, and even the Unix/Linux standard is that executable files do not have an extension (ls, cat, nano, grep, etc.)
Instead, to open a PRG alias from File Manager, select the alias and choose PRG Runner from the File menu, or press CONTROL+O. CONTROL+O is an alternative to COMMODORE+O which is the keyboard shortcut for the standard file open menu option. This opens PRG Runner directly, which is faster than going through the Opener Utility, and the PRG aliases don't need any extension.


With the PRG Runner Utility open you can change which PRG alias is selected and the information is updated, making PRG Runner behave like a float palette. To run the program click the RUN button or press RETURN. (The Utility has to be in focus for RETURN to trigger the RUN button.)
Autorun from PRG Runner
In all likelihood the reason you're opening PRG Runner with a PRG alias is because you know you want to run this program. Hold the CONTROL key while PRG Runner is loaded in to force it to autorun the PRG alias.
Since the keyboard shortcut to open PRG Runner is CONTROL+O, you can hold CONTROL tap and release "O" and continue to hold CONTROL until C64 OS quits and the program starts loading in.
What does PRG Runner do?
PRG Runner reads in all the metadata from PRG alias. First, it gives you some required information. If, for example, the alias indicates that the program is installed on a floppy drive (1541, 1571 or 1581), it will instruct you to insert the correct disk.
If the program does not share the IEC bus and yet you have more than one device active, PRG Runner will warn you that it can't share the bus. It will not allow you to run the program until you've turned off other devices. This can be done within C64 OS using the Drives Utility.
It also tells you what joystick port or ports will be used.
When you click run, PRG Runner formally begins the process of returning to the READY prompt. If you have an REU and Fast App Switching banks are enabled, the current Application is frozen into its REU bank. Otherwise, the current Application is quit, and it saves its state.
PRG Runner than performs any device number swapping that is required. It then assigns a swaplist or mounts a disk image, as required, and changes the default partition and path to the installed location of the program. It then performs a controlled reset of the computer, and then loads and runs the program.
Very reliable but not 100%
This procedure is highly reliable but it can still fail on certain types of program that depend on serious software hacks.
There is a software hack whereby some programs load themselves overtop of low memory ($0300 and up.) This overwrites the RAM vectors so that when the loading completes the program autoruns. PRG Runner cannot handle these types of programs, but they're rare.
How to return to C64 OS
The vast majority of Commodore 64 software does not include a quit or exit feature. Many utility programs, such as those provided by CMD to manage their hardware, tools like D64it, unzip64, Novatext or other major products such as GEOS, Novaterm or GoDot, do offer a quit to BASIC feature. If the program offers one of those features, go ahead and use it.
If the program is written in BASIC, and even with some assembly programs, you can hold the STOP key and press RESTORE. This may or may not work, but it's worth a try.
For all other programs, including most games, a reset button is essential. A C128 has a reset button built in, many C64 cartridges include reset buttons, and there are numerous other hardware solutions for adding a reset button to your Commodore 64. An Ultimate II+ has a reset button and an Ultimate 64 has a mechanism for resetting by tapping the power button. You can also use the menu system of an Ultimate 64, press F5, choose the C64 Machine menu and then Reset C64 or Reboot C64.


However you return to the READY prompt, you can reload C64 OS as you normally would. If you use an REU with Fast App Switching, C64 OS will reboot very quickly by using the Fast Reboot feature.
If PRG Runner swapped device numbers, or mounted a disk image, the physical press of a reset button will send a reset signal to the IEC bus and should restore the storage devices to their default power up state. Unfortunately, if PRG Runner changed the device numbers or mounted a disk image, and the software itself offers a quit to BASIC feature, this will perform a soft reset that does not reset the storage devices. It may still be necessary to press a physical reset button, or to press a reset button on the storage devices, or to power cycle one or more of the storage devices.
Without a means of resetting your C64, power cycling the computer may be the only option. This unfortunately clears the contents of the REU and will require a fresh boot of C64 OS. Applications that were open in the REU will also be closed and any unsaved data in those Applications will be lost. Investing in a reset button is highly recommended.
A C64 with an IDE64 or a RAMLink, or a C128, can be configured to autoboot C64 OS. This can result in a great experience. Simply press the reset button, the C64 returns to the READY prompt and automatically reboots C64 OS. With an REU it fast reboots and therefore with the push of the reset button you are back to where you left off in only a few seconds.
REU usage by non-C64-OS software
Applications designed for C64 OS uses the proper APIs to access and to share the REU with the system and with other Applications.
However, once you leave C64 OS, if other software uses the REU it will very likely corrupt the data that C64 OS has stored there. Read about Fast Reboot, the risks involved when running non-C64-OS software, and how to recover if Fast Reboot fails or locks up, in Chapter 4: The User Interface → Fast App Switching.
Next steps
After fast rebooting back into C64 OS, you find yourself exactly where you left off. Even PRG Runner is still open, and the alias to the program you just left is still selected.
Simply select another alias, click RUN, and off you go launching that program.


Next, let's look at launching Tanks 3000, which requires PRG Runner to mount a disk image.
Besides seeing that the path includes the name of the disk image to mount, there is no difference to launching this program. Simply click RUN, and the disk image will be mounted for you.


In this case, the devices numbers did not have to be swapped. The SD2IEC is the only device, C64 OS is installed in partition 1, and so the disk image was mounted to partition 2. If we performed a soft reset, the disk image may still be mounted.


Click the SD2IEC device from the devices list to bring the current tab to the partition directory of that device. You may notice that, as shown above left, the partition is showing as 1541 type (type code "4") rather than the native partition (type code "N".) And the name of the partition is the header from the disk image's directory.
Double-click that partition to navigate into it. Choose Unmount from the Options menu to manually unmount the disk image. If you return now to the SD2IEC's partition directory, shown above right, you will see that the partition is showing as type native again.
Using PRG Aliases from App Launcher
Using PRG Runner to run programs either directly or from their PRG alias from File Manager is pretty useful. But adding PRG Aliases to App Launcher's desktops is next level.
The fact that App Launcher can have on a single desktop programs installed in totally different places, requiring totally different system configurations to run, makes it plainly obvious why PRG aliases are so useful.
Switch to App Launcher by choosing App Launcher from the Go menu, or pressing COMMODORE+L.


Navigate to the desktop where you want to add some PRG aliases. Then choose Add Alias from the File menu, or press SHIFT+COMMODORE+L.
The standard Open Utility opens allowing you to navigate the file system. Navigate to the //os/prg aliases/ directory on the system device. Pick an alias and click the Select button to add it to the desktop. The Open Utility remains open. This is by design. You can pick another alias, and click Select, and another and another, to add multiple aliases to the desktop, without having to repeat the process of opening the Open Utility.
Once you've added all the aliases you want to, then close the Open Utility.


Each time an alias is added to the desktop it is given a default position at the top left. If you've added multiple aliases they end up stacked on top of each other. Drag individual aliases from the top of that stack and put them where you want on the desktop.
You can also drag them individually just far enough to separate them, the drag a box around the whole group and drag the group to a new position.
Finally, we probably want to color code our aliases. Since these are PRG aliases, maybe we want to give them a color that will distinguish them from other native C64 OS software. Choose Colors from the Options menu to open the Colors Utility.


With a set of aliases selected, click a color from the Colors Utility. How you organize your desktops, with background images, hint color for the desktop, collections of aliases of different kinds, grouped and color coded, you can truly make each desktop you own.
Use Desktop Designer to design your own desktop background images. Get creative and personalize your C64 to your own style and taste.
Open a PRG alias from App Launcher
App Launcher already knows from the aliases on the desktop, which ones are C64 OS Applications, which are C64 OS Utilities, and which ones are PRG aliases.
Simply double-click a PRG alias from the desktop, or select it and choose Open from the File menu, or press COMMODORE+O, and PRG Runner will open to handle it. Click RUN.
Next Chapter: File System
Table of Contents
This document is subject to revision updates.
Last modified: Dec 12, 2025